How to Make Fabric Flowers?

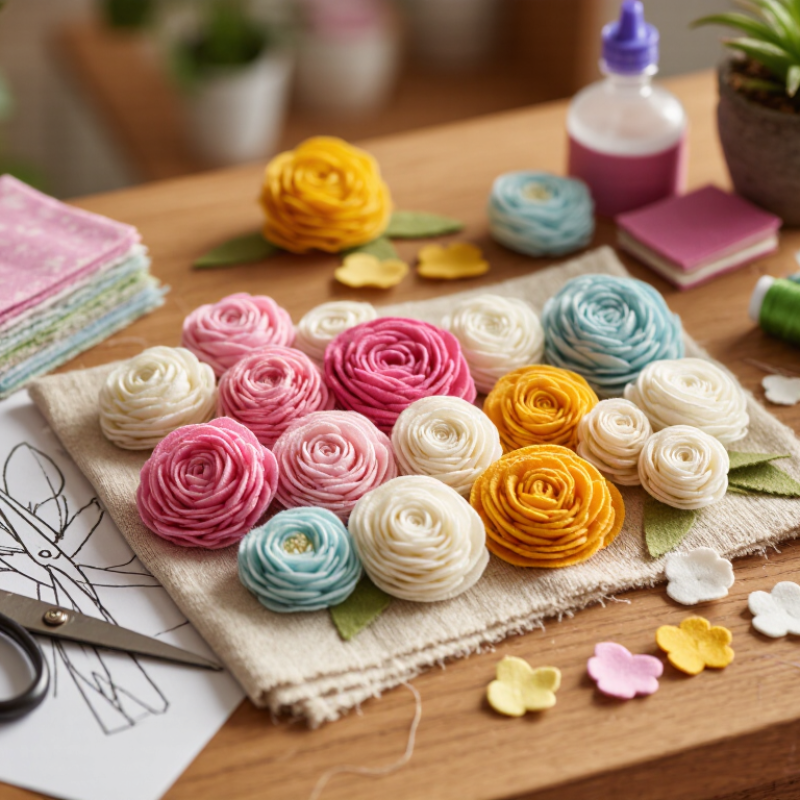
Fabric Flowers can bring color and texture to clothing, gifts, and home decorations without requiring a large craft studio. A small work surface, sharp scissors, fabric scraps, needle and thread, and a simple template are enough to begin. Cotton is forgiving for early projects, while felt holds its shape and satin creates softer, shinier petals. The fabric you choose changes both the look and the difficulty.

This guide explains how to plan, cut, shape, and assemble a basic fabric flower. You’ll learn why folding a fabric square into layered petals can save time, how a few careful stitches keep the center secure, and when a dab of fabric glue may help. Keep the petals similar, but not perfectly identical. Natural-looking flowers often have small differences.

Start with a simple design. A compact rosette or rounded petal flower is easier to adjust than a layered bloom with many narrow pieces. Test your template on scrap fabric before cutting the final pieces; slippery material can shift, and thick layers may become bulky. I’ve found that pressing fabric gently before cutting makes the edges easier to handle, though it does not solve every problem. Some fabrics fray more than expected. That’s part of the process, not a reason to abandon the project. By the end, you’ll have a handmade flower and a clearer sense of which materials suit your next one.
How to Make Fabric Flowers?

Materials and Tools for Making Fabric Flowers

Choose fabric that behaves well when gathered. Cotton, linen, felt, and satin can all make attractive flowers, but each folds differently. Cotton holds crisp petals; satin gives a softer shine and may slip while cutting. Test a small scrap before you commit. I once chose a lightweight fabric that frayed more than expected, so a little preparation saved the finished edges.

A hand-sewing needle, matching thread, sharp fabric scissors, and pins cover most basic projects. Keep the scissors for fabric only; dull blades can leave ragged cuts.

For shaping, gather a pencil, ruler, and paper for a simple petal template. A thimble helps when stitching through several layers. Use fabric glue only when the material’s care instructions allow it, and test it on a hidden scrap because some glues leave stiff spots.

Small details matter. A button, bead, or wrapped fabric strip can form the center, while floral wire and tape help create a stem. If you use wire, trim it with suitable cutters and cover any sharp end. Keep a heat-safe surface nearby if your method involves an iron. Work slowly around the petals; even spacing takes practice, and my first few were uneven. That is not always a flaw. Slight variations can make a handmade flower feel more natural.
Choosing a Flower Design and Suitable Fabric

How to Make Fabric Flowers?

Choosing a Flower Design and Suitable Fabric

Start with the flower’s shape, not the prettiest scrap in your basket. A rose needs overlapping petals that curl; a five-petal daisy suits flatter, stable cloth. For a soft peony, lightweight cotton or voile makes easy folds. Satin creates shine, but its slippery edges can frustrate beginners. I’ve found that testing one petal first saves time. Sometimes, it still looks odd.

Fabric choice also depends on the finished flower’s job. A hair clip needs petals that hold their shape, while a brooch can use softer layers. The Textile Exchange’s Materials Market Report 2024 estimates global fiber production reached 124 million tonnes in 2023, with polyester accounting for about 57 percent. That scale reflects polyester’s wide availability, not a recommendation for every craft. A small polyester offcut can work well for singed edges, but use careful heat control and ventilation. Cotton is easier to cut and stitch, though it may fray.

Check drape, thickness, and edge behavior before cutting a full set. Pin a test petal, gather it, and see whether the fabric springs back or droops. For crisp petals, try a small amount of fabric stiffener on a scrap first. The result can feel too rigid. Washable flowers also need materials and finishes that tolerate the intended care, so check fabric labels and test a hidden piece.

How to Make Fabric Flowers? - Choosing a Flower Design and Suitable Fabric

Flower Design Suitable Fabric Why It Works Basic Construction Skill Level Useful Note
Gathered rosette Light- to medium-weight cotton, satin, or rayon Flexible fabric gathers easily into a spiral and forms soft folds. Gather a long fabric strip along one edge, coil it into a spiral, and stitch the base in place. Beginner A narrow strip makes a compact flower; a wider strip creates fuller folds.
Layered petal flower Cotton, linen, or lightweight broadcloth These woven fabrics are easy to cut and hold stitched layers securely. Cut several petal shapes, stack them with staggered placement, and sew or glue them at the center. Beginner Woven cotton edges can fray; use pinking shears or finish the edges if needed.
Soft felt flower Wool felt or synthetic felt Felt does not unravel at cut edges and keeps simple shapes neat. Cut a spiral or individual petals, roll or overlap them, then stitch or glue the base. Beginner Thicker felt creates sturdier flowers but may be harder to gather or layer in small sizes.
Ruffled chiffon flower Chiffon or georgette Sheer, lightweight fabric creates airy, softly draped petals. Cut circles or rounded petals, layer them, and secure the center with stitches or a covered button. Intermediate Chiffon can shift while cutting; use sharp shears and handle the pieces gently.
Sculpted singed-petal flower Polyester organza or another heat-sensitive synthetic fabric Careful heat can curl some synthetic edges and give petals a shaped appearance. Cut rounded petals and carefully warm the edges to shape them, then layer and secure the centers. Intermediate Use only with suitable synthetic fabric, test a scrap first, and work with ventilation and heat-safe precautions. Do not singe natural fibers.
Folded fabric flower Medium-weight cotton, satin, or quilting fabric Fabric with enough body holds folded petals in a defined shape. Fold square fabric pieces into petal shapes, stitch or glue the bases, and arrange them around a center. Intermediate Pressing folds can help keep petals even; check the fabric care label before applying heat.

Preparing and Cutting the Fabric Petals

Preparing and Cutting the Fabric Petals

Choose a fabric that suits the flower’s purpose. Cotton is easy to shape and holds a crease, while lightweight silk creates softer, more fluid petals. Test a small scrap before cutting; some fabrics fray more than expected. I learned that the hard way.

Draw a simple petal template on stiff paper, then trace it onto the fabric with tailor’s chalk or a washable marker. Keep the grain direction consistent so the petals bend evenly. For a fuller flower, cut several sizes, with the smallest petals reserved for the center. Stack the fabric in a few layers, pin it securely, and cut slowly with sharp scissors. Check the edges before removing the pins.

Small variations can make handmade flowers feel natural, but uneven shapes may twist when assembled. I still find this balance tricky. If your fabric slips, cut one layer at a time instead. Leave a narrow allowance if you plan to fold or stitch the edges. Marking every petal takes longer, yet it makes the final arrangement easier to control.

How to Make Fabric Flowers: Preparing and Cutting the Petals

Example template dimensions for a layered fabric flower: cut each successive petal layer slightly larger to create a fuller shape. Measurements are illustrative and can be adjusted to suit your design.

Assembling and Shaping the Flower

After cutting fabric petals, stack them from largest to smallest, turning each layer slightly so the edges do not line up. A small overlap creates a fuller center. For a soft flower, use lightweight cotton or voile; thicker fabric holds sharper shapes but can make the center bulky. Pin the layers before stitching. It is easy to shift them by accident.

Sew through the center with a few firm stitches, then knot the thread on the back. Add a button or a small fabric-covered circle to hide the stitches. Shape the petals with your fingers, curling their edges gently around a pencil or pressing a shallow crease into each one. Test the heat setting on a scrap first. Some fabrics scorch quickly, and synthetic fibers may melt. A little unevenness can look natural; too much can leave the flower lopsided.

Using leftover cloth can also reduce waste. The U.S. Environmental Protection Agency’s 2018 textiles data estimated that 17 million tons of textiles entered the municipal solid waste stream, while about 2.5 million tons were recycled. These figures cover textiles broadly, not craft scraps specifically, but they show why small-scale reuse has practical value. Keep the scraps that hold their shape, and discard pieces that fray beyond control.

Finishing and Securing the Fabric Flower

Finishing and Securing the Fabric Flower

A fabric flower can look finished before it is secure. Turn it over and inspect the gathered center, where loose threads can unravel with handling. Use a needle and matching thread to take several small stitches through every petal layer. Keep the stitches close to the center; long ones may show on the front. Pull the thread snug, not tight, or soft petals can pucker. A slightly uneven center is normal. Mine often needs another stitch after I think it is done.

For a brooch, sew a bar pin firmly to a small felt circle, then attach the circle to the flower’s back. For a hair clip, stitch around the clip’s holes or wrap and sew the stem securely. Test the attachment with a gentle tug. The U.S. Environmental Protection Agency’s 2018 materials-management report estimated that 17 million tons of textiles entered the U.S. waste stream that year. Careful finishing cannot solve textile waste, but it can help a handmade piece last longer. Check the back again before wearing it; that part is easy to rush.